Rooftop Views And Why
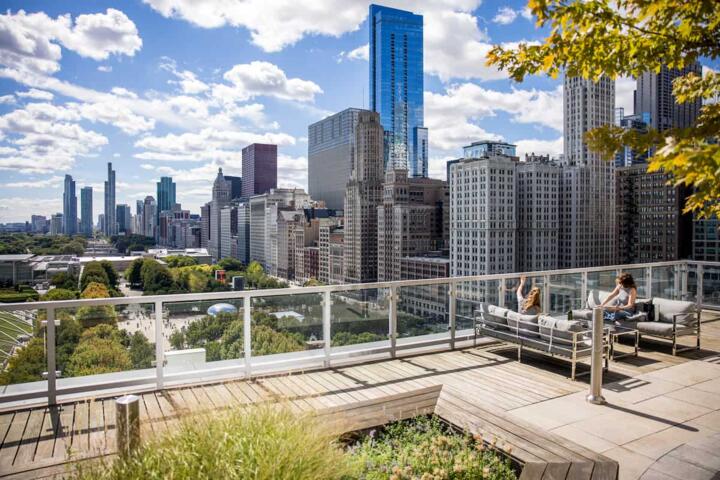
Rooftop viewpoints give you a high vantage point that changes how you read a city: streets compress into patterns, landmarks align, and neighborhoods become easier to judge by distance and elevation. That shift matters for travelers who want orientation, not just photos. A rooftop also tends to offer better airflow than street level, which can reduce the “stale air” feeling in crowded areas.
Practical examples show up quickly. From a rooftop terrace, you can often trace a river or coastline, spot a major transit hub, and estimate how long a walk will feel based on the slope and block size. In many cities, rooftop bars and observation decks also reduce the need to fight for a window at street-level attractions. The tradeoff is that rooftops expose you to wind, heat, and sudden weather changes, so planning affects comfort as much as scenery.
Rooftop access can be limited by building rules, event schedules, and capacity limits. Some venues require a ticket or a minimum spend, while others are open only during certain hours. If you rely on an elevator, check whether the route includes stairs at the final level; some rooftops have a short stair segment even when the main building is accessible.
Common Pain Points
People often treat rooftop visits like a simple “go up and look” activity, then get surprised by constraints that are predictable once you know what to check. The first issue is weather exposure: wind can make it feel colder than the forecast, and glare can wash out photos even on partly cloudy days. The second issue is access timing: many rooftops close for maintenance, private events, or cleaning, and the last entry time can be earlier than the posted closing time.
Another frequent mistake involves safety assumptions. Railings vary widely in height and design, and some rooftops have uneven surfaces, low parapets, or wet decking. If you travel with mobility aids, you may find that the rooftop door threshold is higher than expected, or that the elevator stops one floor below the viewpoint. Crowd management also matters; when a venue hits capacity, staff may restrict entry mid-session, which can strand you if you planned around a specific sunset window.
Rooftop experiences depend on supporting systems: building access control, elevator reliability, weather monitoring, and crowd flow. Even a well-run venue can feel chaotic if entry lines funnel through a narrow stairwell. On the planning side, mapping apps can mislead when they route you to a service entrance or a closed gate, so it helps to verify the public entrance from recent reviews or venue instructions.
How To Plan A Rooftop
Check Access And Hours
Start with the venue’s official hours and last entry policy, then confirm whether rooftop access requires a reservation. If the rooftop is part of a hotel, the “public” rooftop may still have guest-only periods. For a quick reality check, compare the posted hours against recent visitor notes dated within the last few months; I’ve seen venues change closing times without updating every third-party listing.
Look for the route details that matter for your body and your time. If you need step-free access, ask whether the elevator reaches the rooftop level or stops one floor short. If you use a stroller or carry luggage, check for narrow doors and tight turns near the stairwell. A small detail like a 1–2 step threshold can decide whether the visit stays comfortable or becomes stressful.
Plan For Weather Exposure
Use the hourly forecast rather than the daily summary, since rooftop wind and temperature swings show up quickly. Bring a light layer even in warm seasons; wind chill can be noticeable once you’re above the surrounding buildings. If you’re sensitive to sun, pack sunglasses and a hat, because glare off glass and metal can be intense.
For photography, consider the sun angle. Late afternoon light can look great, but it can also create lens flare and reduce contrast. If you’re using a phone camera, test exposure by taking one quick shot at the start; on iOS 17.5, for example, I’ve found that the “tap to focus” behavior can shift brightness when the sky dominates the frame.
Manage Crowds And Timing
Rooftops often peak around sunset and major events, so plan a buffer. Arriving 20–40 minutes before the peak can reduce time spent in a line, but it also means you may miss the exact light you wanted. If the venue posts a capacity limit, assume entry could pause during busy periods.
Choose a time window that matches your goal. For skyline orientation, earlier daylight can make street grids and transit lines easier to interpret. For mood and color, schedule around your target light but keep an alternate plan nearby in case weather changes or the rooftop closes early.
Pack For Comfort And Safety
Bring water, especially in hot weather, since rooftops can trap heat. Wear shoes with solid grip; rooftop surfaces can be slick when there’s mist, recent rain, or cleaning residue. If you’re prone to motion discomfort, note that wind can create a subtle sway effect near open edges.
Carry a small bag with essentials and keep it compact so you don’t block walkways. If the rooftop has a bar or café, check whether you can bring your own water; some venues sell only bottled drinks, and prices can be higher than street level. I’ve also seen venues discourage large tripods, which affects how you plan a longer photo session.
Educational Case Examples
Scenario 1: Orientation trip with limited time. A traveler visits a dense downtown area and wants to understand where the waterfront sits relative to the main train station. They choose a rooftop observation deck with daytime hours, arrive mid-morning to avoid peak crowds, and spend 15 minutes scanning major sightlines before taking photos. The traveler uses the rooftop view to plan a walking route, then checks the route length on a map app at street level to account for stairs and crossings.
Scenario 2: Family visit with accessibility needs. A group includes a wheelchair user and a child who gets restless in lines. They select a rooftop venue that explicitly states step-free access and elevator service to the rooftop level. They avoid the sunset rush by scheduling an early evening slot, bring water, and keep the visit short to reduce fatigue. When they arrive, staff confirm the rooftop capacity and guide them to an accessible viewing area, which prevents the group from getting stuck near a narrow doorway.
Rooftop Choice Checklist
| Decision Factor | What To Look For | Why It Matters | Quick Check |
|---|---|---|---|
| Access Route | Elevator to rooftop vs final stairs | Determines step-free feasibility | Ask venue or read recent reviews |
| Weather Exposure | Wind, rain policy, shade | Comfort and safety on edges | Check hourly forecast and venue rules |
| Capacity And Timing | Last entry, crowd controls | Avoids being turned away | Arrive before peak windows |
| Viewing Quality | Open deck vs enclosed glass | Affects glare and sightlines | Look for photos taken in similar light |
If you want a simple step-by-step approach: confirm access route, check last entry, review hourly weather, plan a time buffer, then pack for wind and sun. That sequence prevents most planning failures, including the ones caused by last-minute closures.
Practical Common Mistakes
Skipping the access details is the most common avoidable problem. A rooftop can look reachable on a map, yet the public entrance may be around the corner, behind a security desk, or inside a building with limited hours. Another frequent mistake is arriving at the exact peak time without a backup plan; when capacity is reached, staff may stop entry and you lose the light you planned around.
People also underestimate how quickly comfort changes on rooftops. A “warm” day can feel cold once wind picks up, and a “dry” forecast can still bring mist or drizzle at elevation. Wearing shoes with poor grip can turn a short walk into a safety issue, especially near wet decking or cleaning zones.
Finally, travelers sometimes assume rooftop rules match street-level norms. Some venues restrict drones, large tripods, or selfie sticks, and others limit alcohol service. Reading the posted house rules prevents awkward confrontations and keeps the visit calm for everyone.
FAQ
Are rooftop views safe for kids?
Safety depends on railing height, crowd density, and surface conditions. Choose venues with clear barriers, avoid peak congestion, and keep children away from edges and wet areas.
What weather conditions cancel rooftops?
Many venues close or limit access during heavy rain, strong winds, or lightning risk. Check the venue’s policy and the hourly forecast close to your visit time.
Do I need a reservation for a rooftop?
Some rooftops require reservations, especially for popular observation decks or rooftop bars. Verify the booking requirement on the venue’s official site and confirm last entry times.
How can I reduce glare for photos?
Use open-deck viewpoints when possible, avoid shooting directly into the sun, and adjust exposure by tapping the sky or landmark area on your phone camera.
What accessibility issues should I ask about?
Ask whether the elevator reaches the rooftop level, whether there are step thresholds, and where accessible viewing areas are located. Confirm any narrow doors or required stairs.
Author's Insight
Rooftop viewpoints combine visual orientation with environmental exposure, so the “best” choice depends on your tolerance for wind, sun, and crowds. Planning works when you treat the rooftop as a venue with rules, not a public sidewalk. The most reliable approach is to verify access route details, last entry timing, and weather policies from the venue itself, then cross-check with recent visitor notes.
Comfort improves when you pack for elevation effects: a light layer, grip-friendly shoes, and water. If you’re traveling with accessibility needs, the key variable is the final route from elevator to deck, which varies by building design.
Key Takeaways
- Rooftop views help with city orientation, but wind and sun change comfort quickly.
- Confirm access route, last entry, and capacity rules before you go.
- Use hourly weather and plan a time buffer for lines or early closures.
- Pack for safety: grippy shoes, water, and a layer for wind.
- Check venue rules for photography gear and alcohol policies to avoid last-minute issues.